SCOM Management Packs Overview
Microsoft System Center Operations Manager (SCOM) serves as an effective solution for monitoring data centers, particularly focusing on virtual services, applications, and various infrastructure elements.
This platform offers organizations a centralized approach to real-time oversight, ensuring optimal health and performance within their IT ecosystems.
A key feature of SCOM is its flexibility, achieved through the incorporation of management packs.
Management packs act as enhancements that provide additional functionalities to SCOM.
These packs come equipped with predefined settings, configurations, and monitoring tools designed specifically for certain applications, services, or technologies.
By utilizing management packs, SCOM can oversee a wide range of systems, including operating systems, hypervisors, and external applications, all from one cohesive interface.
This level of adaptability makes SCOM crucial for businesses that handle complex and evolving IT infrastructures.
Moreover, SCOM not only monitors Microsoft products but also supports third-party integrations and custom management packs.
This allows for the oversight of non-Microsoft platforms, such as Linux or VMware, offering businesses comprehensive visibility across varied environments.
This discussion will delve into the essentials of SCOM management packs, outlining their structure, purpose, and their role in enhancing IT operations.
Additionally, it will provide a detailed guide on how to set up and configure management packs in SCOM to fully leverage their capabilities.
Before exploring the technical aspects, it is vital to grasp the concept of management packs and their significance in broadening SCOM’s monitoring functions.
This understanding will help users recognize how SCOM can be customized to fulfill the specific needs of their IT frameworks.
SCOM (System Center Operations Manager) Management Packs are essential tools that function as software agents installed across various systems or services to collect crucial performance metrics.
These packs are essentially pre-configured solutions that facilitate the monitoring of specific applications and services, offering users immediate support without extensive setup.
A typical management pack encompasses several components, including:
-
Monitors : These assess different aspects of system performance, such as disk usage or service availability. Each management pack may utilize various monitors tailored to the service being observed.
-
Rules : They establish the conditions under which specific events or performance metrics are tracked. Typically structured as if/then statements, rules trigger alerts when defined performance issues arise.
-
Views and Dashboards : These elements offer unique perspectives for overseeing your infrastructure, encompassing various monitoring options like state, alerts, and overall performance.
-
Knowledge : This component provides contextual information about alerts, combining insights from rules and monitors to explain the reasons behind an alert's activation and possible underlying issues. Users can access this information in the management console.
-
Tasks : These are scripts or executables designed to perform specific actions related to a service. Tasks can include diagnostic functions to identify problems or recovery actions, such as restarting applications or removing files.
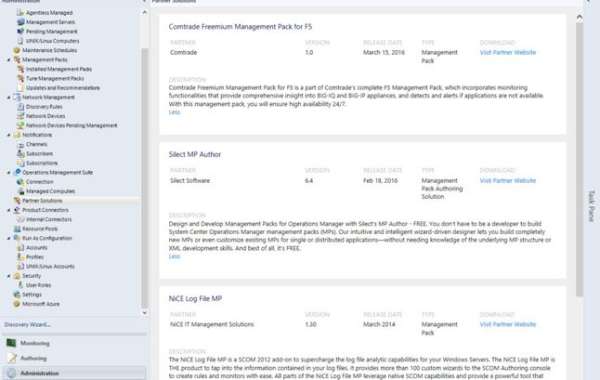
Management Packs are available from both Microsoft and third-party vendors. Microsoft develops packs for a broad array of tools, including SharePoint, SQL Server, Azure, and Hyper-V. Conversely, third-party packs may cover a wider spectrum, monitoring everything from applications to virtualized environments.
It’s important to understand that management packs can be categorized into two types: sealed and unsealed. Sealed packs, which are typically binary files, cannot be modified. In contrast, unsealed packs are XML files that users can edit, providing flexibility for customization. Generally, hardware and software vendors prefer sealing their packs, while open-source developers are more inclined toward unsealed options.
Notably, the composition of management packs varies. Some may include all the components mentioned, while others might only encompass a select few, depending on the specific use case and the targeted service. Additionally, some management packs are often referred to as libraries, highlighting their role in providing a repository of monitoring capabilities.Management Packs in SCOM play a crucial role in monitoring and managing your IT environment effectively.
They consist of several key components:
-
Customized Reporting : These reports give insight into the findings of the monitoring processes. They are tailored to specific metrics, allowing for a comprehensive analysis of performance issues related to the monitored aspects.
-
Object Discovery : This feature identifies network objects that require monitoring. It utilizes various methods such as WMI, scripts, custom code, LDAP, or OLE DB to ensure that all relevant components are included in the monitoring process.
-
Run As Profiles : These profiles define which users possess the necessary permissions to engage with tasks and monitors within the system. When a management pack is imported into Operations Manager, it includes the ‘run as’ profile, enabling proper access control.
Understanding these components is essential for setting up and utilizing SCOM Management Packs effectively.
To effectively utilize a management pack within SCOM, the initial step is to install and import it. This guide will outline the process of importing a management pack directly from the Microsoft catalog via the Operations Console, as well as downloading it from online sources.
First, ensure that you have administrator access before proceeding. It’s crucial to note that for any management pack marked as "online catalog only," you will need to download the .msi file and perform the import from your local disk.
To import a management pack from the Microsoft catalog through the Operations Console:
- Open the Operations Console and navigate to the Administration section.
- Right-click on "Management Packs" and select "Import Management Packs."
- When the Import Management Packs Wizard appears, click on “Add” and then choose “Add from Catalog.”
- In the dialog box that opens, search for the desired management pack and select it by clicking “Select,” then “Add.” Here you can choose a product or expand to select a specific version or pack file.
On the "Select Management Packs" page, you will see the packs ready for import, each accompanied by a colored icon indicating the action required:
-
Green Icon : This indicates that you can proceed with the import. Simply click “Import.”
-
Yellow Icon : This signifies that the management pack is dependent on another pack that is not included in the import list but is available in the catalog. You can resolve this by clicking “Resolve” in the status section and following the prompts.
-
Red Icon : This indicates a dependency on packs that are absent both from the import list and the catalog. You can click “Error” in the status section to view which packs are missing. If necessary, you can remove any management pack from the import list by right-clicking and selecting “Remove.”
Once you complete the import process, the progress for each pack will be displayed. You can click on each pack to view detailed status updates, and upon completion, you can close the wizard.
Next, to download a management pack online:
- Open your web browser and navigate to the Microsoft Management Pack List.
- Browse through the available packs until you locate the one you wish to download.
- Click on the selected pack, then proceed to the Microsoft Download Center page and click “Download.”
- In the file download dialog that appears, select “Run” to initiate the download and extraction of the pack files.
By following these steps, you will successfully import and utilize management packs within SCOM, enhancing your monitoring capabilities.
Third-Party Management Pack Setup
In this segment, we will explore the setup process for a third-party management pack. One prominent example is the SolarWinds Management Pack, which is designed for infrastructure monitoring. This pack enables users to access device summary information directly through the Operations Console.
Before proceeding with the download, ensure you possess one of the following products: SolarWinds Network Performance Monitor, SolarWinds Server & Application Monitor, or SolarWinds Web Performance Monitor.
To initiate the installation of the SolarWinds Management Pack, follow these steps:
- Obtain the SolarWinds Management Pack specifically for Microsoft System Center Operations Manager (SCOM).
- Log in to SCOM using an account with local administrator rights.
- Execute the SolarWinds Management Pack installation file (SolarWinds Management Pack for SCOM 20x.msi) that you downloaded.
- Click "Next" to proceed.
- Agree to the terms by clicking "Accept" and choose your desired installation folder.
- Continue by pressing "Next" and then click "Install."
- Once the installation is completed, click "Finish."
After completing the installation process, the configuration wizard for the SolarWinds Management Pack will automatically launch.
To configure the pack:
- Start by inputting your personal information into the wizard and click "Next."
- Provide the IP address or hostname of your SolarWinds server, along with the web console port number, user ID, and password. Click "Next."
- From the list, select the nodes and interfaces you wish to monitor, then click "Next."
- Choose the NetFlow nodes you want to monitor and proceed by clicking "Next."
- Select the applications and components for monitoring, then click "Next."
- Specify the transactions and transaction steps to monitor and click "Next."
- Finally, enter your desired data collection frequency and database change settings before finishing the setup by clicking "Finish."
If you ever find that you no longer require a particular management pack, it can be removed through the Operations Console. However, be aware that you may need to delete any dependent management packs first. The removal process is straightforward—just ensure you are logged in with an administrator account:
- Navigate to the Operations Console and select "Administration."
- Click on "Management Packs."
- Right-click on the management pack you wish to delete and select "Delete."
- Confirm the deletion by clicking "Yes" when prompted regarding the impact on user roles.After you deploy a management pack, your responsibilities are far from over.
It's important to consistently monitor its performance to ensure it's meeting your expectations.
Changes in hardware, software, or upgrades can significantly impact how your network operates, which may necessitate adjustments to your monitoring setup.
Regularly reviewing management packs and their settings allows your monitoring strategy to evolve with your changing requirements.
For SCOM monitoring, SolarWinds Server & Application Monitor is an excellent choice as it seamlessly integrates performance metrics into the management console.
As a best practice, Microsoft suggests maintaining a backup of previous versions of management packs. This precaution enables you to revert to an earlier version if any issues arise.
Microsoft Team Foundation Server and SharePoint Server are recommended for storing these archives.
You have a variety of options when it comes to sourcing management packs, whether from Microsoft's website or third-party providers, allowing you to tailor your monitoring environment to your preferences.
Importing SCOM management packs is a key process that enhances the operational database of SCOM.
Once the packs are transferred, any associated files are removed from the system.
Interestingly, Microsoft has transitioned away from using SCOM for its internal applications, opting instead for Azure Monitor.
Within a System Center Operations Manager management pack, a rule is a critical component.
It directs SCOM on how to find the necessary data for monitoring.
This is the core of the tracking functionality and includes directives on actions to take based on specific conditions identified within the collected data, such as triggering an alert if a metric exceeds or falls below a defined threshold.
What is a Netflix VPN and How to Get One
A Netflix VPN is a virtual private network used to access region-restricted content on Netflix by connecting to servers in different countries. By using a Netflix VPN, users can enjoy a broader array of shows and movies that may not be available in their own region, thereby enhancing their streaming experience.
Why Choose SafeShell as Your Netflix VPN?
If people want to access region-restricted content by Netflix VPN, they may want to consider the SafeShell VPN . SafeShell VPN excels with its high-speed servers, which are specifically optimized for Netflix streaming. This ensures that users can enjoy their favorite shows and movies without any interruptions. Additionally, the VPN's cutting-edge technology delivers lightning-fast connection speeds, facilitating buffer-free playback and high-definition streaming. SafeShell VPN also allows users to connect up to five devices simultaneously, supporting a wide range of operating systems like Windows, macOS, iOS, Android, and more. This means you can enjoy netflix unblocked on any device of your choice.
Moreover, SafeShell VPN offers an exclusive App Mode feature, enabling you to unlock and enjoy content from multiple regions at the same time. This provides access to a diverse range of streaming services, allowing you to explore a world of entertainment without restrictions. With lightning-fast speeds, SafeShell VPN eliminates buffering and throttling, ensuring unprecedented internet performance for streaming, downloading, and browsing. Most importantly, SafeShell VPN prioritizes your online privacy with its proprietary "ShellGuard" VPN protocol, offering advanced encryption and robust security features. This guarantees that your data is protected, letting you surf with confidence and peace of mind.
A Step-by-Step Guide to Watch Netflix with SafeShell VPN
To enjoy Netflix content from different regions using SafeShell Netflix VPN , follow these straightforward steps.
-
Step 1: Subscribe to SafeShell VPN by visiting their website at https://www.safeshellvpn.com /. Choose a plan that suits your needs and budget, then click "Subscribe Now".
-
Step 2: Download and install the SafeShell VPN app or software by selecting your device type, such as Windows, macOS, iOS, or Android, from their website.
-
Step 3: Launch the SafeShell VPN app and click "Log In" to access your account. SafeShell supports two modes, but for the best Netflix experience, select the APP mode.
-
Step 4: Browse through the list of available VPN servers and select one from the region whose Netflix content you want to access, such as the US, UK, or Canada. Click "Connect" to establish a connection to the server.
-
Step 5: Open Netflix by launching the app or visiting the website. Log in with your Netflix account and start streaming content available in the region you have chosen.